Choice and Production of
Rootstock
-
Two-year transplanted or undercut
open ground rootstocks e.g. Picea abies, Juniperus chinensis 'Hetzii',
are obtained and graded for caliper size. They are root pruned, the lower
side shoots removed to clean the area of stem where the graft is to be
made, and then potted into a 4" (10 cm) diameter pot.
-
The potted plants are stood down in rows in a
bed either in an open or within shade structure. They are grown for one
growing season, paying attention to disease and pest control.
-
After the growing season, a 3 year pot grown rootstock,
will be available for winter grafting.
-
The most common time is during the
winter, December to February.
Selection and Collection
of Scion Wood
-
Each scion should be a terminal shoot of the current
season's growth, 4-6" (10-15 cm) long and have a prominent terminal bud
and at least 3 adjacent radial buds. For the collection of scions from
the mother plants, is necessary to use pruners.
-
If multi-branched scions are required, it may
be necessary to cut into two year old wood, These may be larger; therefore,
rootstock should be at a larger caliper to allow matching. e.g. Globosa
Spruce.
-
Scion should be kept in a moist and cool place
until grafting.
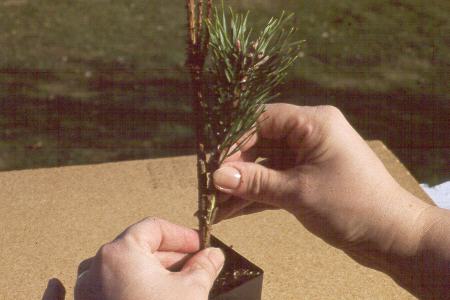
Initial Rootstock Preparation
-
Rootstock should be head back to about 8" (20
cm) using pruners, to facilitate handling. It's important to leave enough
foliage to allow rootstock to grow satisfactorily.
-
Remove basal shoot to clean up the base of the
rootstock. A dry rag is used to clean loose residues from the pot.
|
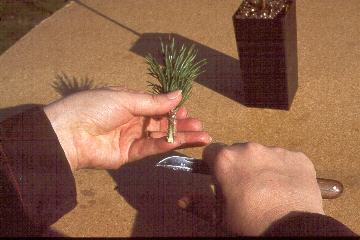
Scion Preparation
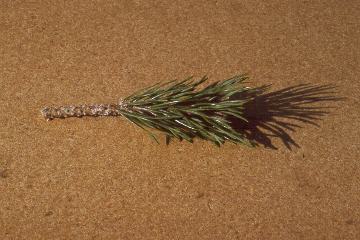
-
Remove basal needles with a knife for about 1¼-1½"
(3-4 cm) up to the stem. It is important that the stem is damage during
this operation. Re-cut the base of the scion.
-
Make a slanting cut, 1" (2.5 cm) long, but not tapered to a point.
-
Reverse the cutting and make a similar cut as mention in the previous
point.
-
Make two 1/8" (3 mm) cuts at the base of the scion to give a better
but firm base.
|
Rootstock Preparation

-
Form a thin flap 1" (2.5 cm) long. Make sure the cut is deep enough,
so the cambium layer is exposed.
|
Matching-up
-
This type of graft allows to match the scion on two sides. One with
the cut of the surface of the main stem of the rootstock, the other with
the flap.
|
Tying-in
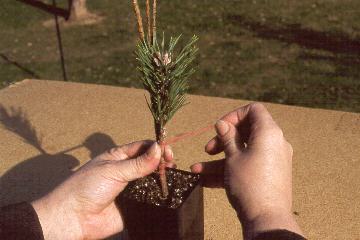
-
Use a rubber grafting strip for tying-in. Start at the top of the graft,
making two turns to form an X, to sucure it. Then spiral down, leaving
1/8" (3 mm) gap between each turn. Secure with a half-hitch knot below
the graft or you can go to the bottom of the graft and then go up and make
the knot in the middle of it.
|
Aftercare
-
Grafts are placed in a polyethylene tent or tunnel, on a layer of moistened
peat moss, ½" (1.3 cm) thick. The surface of the pots are mulched
with peat moss. The base temperature is maintained at 65-68ºF (18-20ºC),
and the humidity above 80%.
-
The tunnel or tent is opened to encourage air circulation, the graft
are ventilated when is necessary. The Graft are lightly dust when the tunnel
or tent is open and subsequent hardining-off.
-
Watering is restricted until new growth is evident.
-
Hardening-off the grafts by increasing the amount of ventilation. This
period begins after 4-6 weeks and is completed by 8-12 weeks after grafting.
by this time the polyethylene has been removed and replace with a shade
cloth.
-
Graft are controlled for pest and disease infection, especially
for red spider mites and spruce aphids.
|
HomeDefinitions
of terms Grafting, step by step Selected
list Side
grafting technique
Spanish
version Search |